Monday, April 30

Asparagus With Poached Eggs & Crispy Onions


Something about this time of year makes me want to live healthier. Blame it on the warm weather (which makes spending time outdoors so much more enjoyable), the abundance of fresh produce, or the need to wear less clothing, but spring is a much more motivating time to eat better than the typical January detox. This veggie-packed brunch dish (inspired by this recipe) was the perfect way to start my day over the weekend and gave me tons of energy for a walk down to the beach (treating myself to Pinkberry on the way home may have also sweetened the deal). The roasted asparagus is a great alternative to bread as a way to soak up the oozy egg yolk and the crunchy ramps and onions are an addictive addition to pretty much anything. If you feel the need to add some meat, a few lean slices of prosciutto draped over the top wouldn’t hurt.


Poached Egg with Asparagus, Ramps, & Spring Onions:
  • Toss 1 large bunch of thin* asparagus with the zest of 1 lemon, a drizzle of olive oil, salt, and pepper.
  • Roast on a sheet pan in a hot broiler for 3-4 minutes, or until crisp-tender.
  • Transfer asparagus to plates, then add 2 thinly sliced ramps** and 3 thinly sliced spring onions*** to the pan and toss with residual olive oil and the juice of 1/2 the lemon.
  • Broil the mixture for 2-3 minutes, or until the veggies are charred in some places. Set aside.
  • Meanwhile, bring a small pot of water to a simmer, add in 1 tbsp. white vinegar, and drop in a raw egg.
  • Poach the egg for 4 minutes, or until the whites have set, then transfer to a paper towel to drain and season with salt and pepper.
  • Repeat poaching with a remaining egg.
  • To serve, top the asparagus with an egg and sprinkle with the charred onions and ramps.

Serves two
*Increase the cooking time if you can't find thin asparagus.
**Found at farmer's markets during the spring. Sometimes called spring garlic.
***Also found at farmer's markets during the spring. Can substitute both with leeks and regular garlic.


Roasted Baby Artichokes


In order to cook as often as I do, I usually plan all of my meals the weekend before and then go shopping for ingredients only one time. When I saw these baby purple artichokes at our farmer's market, however, I couldn't resist dropping my plans and cooking them up for dinner that night. Unlike regular artichokes, babies are much quicker and easier to cook and can be grilled, sauteed, or steamed. I like to pan roast them with lots of garlic and lemon (lemon and artichokes really are best friends) so that they caramelize and get super tender. It's a great side dish to showcase the fleeting and delicious produce of spring.


Roasted Baby Purple Artichokes with Garlic & Lemon:
  • Peel the tough outer layers off of 10-12 baby artichokes,* slice off any brown spots on the stem, and cut in half.
  • Meanwhile, heat 1 1/2 tbsp. olive oil in a large skillet over medium-high heat.
  • Add in the 3 cloves of thinly sliced garlic and the artichokes, cut-side down.
  • Cook for 5 minutes, or until caramelized, then add in 1/2 c. chicken stock, the zest of 1 lemon, salt, and pepper.
  • Cover the pan with a lid and let the artichokes steam for 7-10 minutes, or until all of the liquid evaporates and the artichokes are tender.
  • Add in 1 tbsp. minced fresh parsley and the juice of 1/2 lemon. Check for seasoning.
  • Plate and serve with extra parsley and lemon wedges.

Serves two - four (side dish or starter)
*This recipe works just as well for baby green artichokes.


Friday, April 27

Baked Eggs with Beet Greens & Spiced Butter


Sometimes the only thing you need to do to become a better cook is to buy better ingredients. Lately, my boyfriend and I have become obsessed with the farm fresh eggs we get at our local farmer’s market, which taste so much better than the ones we buy at the grocery store. You can literally see the difference in quality due to the thick, puffy whites and deep, golden yolks of the fresh eggs. Using them makes ordinary fried eggs taste magical, but I’ve also been trying out different egg-centric recipes. This recipe (adapted from Plenty) features baked eggs with wilted beet greens, yogurt, and spicy butter. It’s a great way to showcase the fresh eggs, although the peppery greens and butter would make anything taste good.


Baked Eggs with Beet Greens & Spiced Butter:
  • Heat 1 tbsp. olive oil in a skillet over medium-high heat.
  • Add in 2 large bunches of washed, roughly chopped beet greens, 1 clove minced garlic, salt, and pepper.
  • Cook until greens are wilted, about 5 minutes.
  • Make 3-4 wells in the greens and crack a raw egg into each.*
  • Place the skillet in a 300°F oven for 10-15 minutes, or until whites are set.
  • Meanwhile, melt 1/2 stick salted butter, 1/4 tsp. red chili flakes, and 1/4 tsp. paprika in a skillet until butter foams and turns red.
  • Add 5-6 shredded fresh sage leaves to the butter and cook for another minute or two.
  • Remove the eggs from the oven, top with a dollop of Greek yogurt, and then drizzle the spiced butter on top.
  • Serve immediately with bread.

Serves two
*Or transfer the greens to individual baking dishes and crack two eggs in each.


Thursday, April 26

How To: Grill a Steak


We’re lucky enough to grill year-round in L.A., but for most people barbecue season has just arrived. The king of all grilled meats is a steak, so I thought it fitting to provide some insight on how to get it perfectly cooked every time. It doesn’t matter if you use a premium gas grill or a standard charcoal one, the most important thing is to be patient and choose a quality piece of meat. This recipe uses a rib-eye (my personal favorite) and is cooked to medium, but you can certainly use your favorite steak and adjust the doneness to your liking. A good steak only needs some salt and pepper, but more power to you if you want to add your favorite rub, sauce, or compound butter (I love blue cheese crumbles, chimichurri sauce, or garlic-herb butter).


Perfectly Grilled Rib-Eye Steak:
  • Brush a 1 lb. steak with olive oil and generously season with salt and pepper.
  • Let steak sit out at room temperature for an hour* and pre-heat your grill to high 15 minutes before cooking.
  • Place the steak on the grill, cover with the lid, and cook for 5 minutes.
  • Turn** and cook for another 5 minutes, then remove to a plate.
  • Cover the plate loosely with tin foil and let rest for 10 minutes.***
  • Slice steak and serve.

Serves two
*This step is crucial because it allows the steak to cook evenly.
**Resist the urge to check on the steak and flip it multiple times. By only flipping once, the steak will get a chance to caramelize on the outside.
***Be patient. Allowing the steak to rest causes the juices to re-distribute into the meat.


Wednesday, April 25

Panko & Herb Salmon


Any meat is better off with a crispy crust, but it’s even more crucial with soft flakey fish. This panko-crusted salmon has a double crunch factor with a super crispy skin on the bottom and a herb and breadcrumb topping. The fish is cooked in the same skillet the whole time, first on the stove to produce a crispy crust and then in the oven to finish cooking and brown the panko. I love the extra flavor from the Dijon mustard, which acts like a glue between the fish and the herb crust. It’s a super low-maintenance dish that looks and tastes like you spent a lot of time on it, making it equally perfect for a quick weeknight meal or at your next dinner party.


Panko & Herb Salmon:
  • Combine 1/2 c. panko breadcrumbs, 1 1/2 tbsp. fresh minced parsley, 1 tsp. lemon zest, 1 tbsp. olive oil, salt, and pepper.
  • Generously brush two 6-8 oz. salmon fillets with Dijon mustard, season with salt and pepper, and pat the panko mixture on top.
  • Meanwhile, heat 1 tbsp. canola oil in a skillet until very hot, then add in the salmon skin-side down.
  • Cook for 3-4 minutes, then transfer the skillet to a 425°F oven and cook for another 7-8 minutes, or until just cooked through.
  • Divide onto plates and serve with sliced lemons.

Serves two


Tuesday, April 24

Indian Carrot & Lamb Salad


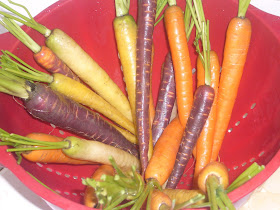
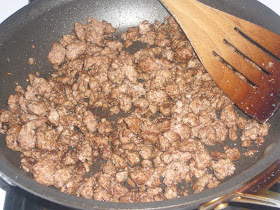
I saw this recipe on an old episode of Jamie at Home and it’s been stuck in my head ever since. It has a lot of ingredients I love: lamb, carrots, Indian spices, but the whole combination is super original and exciting. The star of the show is the raw carrot salad, so I picked up some heirloom varieties at the farmer’s market (although you can use regular orange carrots as long as they are fresh and flavorful) and shaved them with a vegetable peeler into thin ribbons. The salad would make a great side dish on its own, but adding the crispy ground lamb and a dollop of Greek yogurt really rounds out the meal into an interesting entrĂ©e. It’s a great way to experiment with new flavors and will certainly add some color to your standard weeknight dinner plans.


Indian Carrot & Lamb Salad:
For Dressing
  • Combine the juice and zest of 1 lemon, 1 tsp. ground cumin, 1 tsp. ground fresh ginger, and 4 tbsp. olive oil in a small bowl.
  • Season well with salt and pepper and set aside.
For Salad
  • Trim the tops off of 3 bunches (about 24 total) heirloom carrots,* peel and discard outer skin, and then continue peeling carrots to form long, thin ribbons.
  • Meanwhile, add a thin layer of olive oil to a skillet and cook 3/4 lb. ground lamb until no longer pink.
  • Add 2 tsp. garam masala** to the lamb, season with salt, and continue cooking until lamb is brown and crispy.***
  • Toss the carrots with the dressing, 1/2 very thinly sliced onion, and 1 large handful of fresh, chopped cilantro.
  • Divide some of the ground lamb onto plates, then top each plate with some of the carrot salad and a dollop of plain Greek yogurt.
  • Serve with toasted naan bread, if desired.

Serves two - three
*About 1 lb. total of carrots.
**An Indian spice found in most grocery stores.
***My lamb was very lean, but if you have a lot of fat in yours then drain most of it out before serving.


Monday, April 23

Banana Nut Bread

Sweet and nutty banana bread makes a perfect breakfast or snack


I absolutely love banana bread but never realized how easy it was to make until I tried out this recipe for Sunday brunch. The bread is actually more like a cake, with a soft texture that’s full of banana flavor and studded with crunchy walnut pieces. I had also prepared a French omelette, so I just sliced the bread and served some butter and jam alongside, but I can’t wait to use the leftovers to make banana bread french toast. It also freezes perfectly, so make a few loaves and you’ll have homemade banana bread on hand at all times.


More Bread Recipes:
- Buttermilk Cornbread
- Crusty Rye Buttermilk Bread
- Loaded Cornbread Muffins
- Banana Cupcakes with Peanut Butter Frosting


Banana Walnut Bread:
  • Sift together 2 c. flour, 1 tsp. baking powder, 1 tsp. baking soda, and 1/2 tsp. kosher salt in a mixing bowl.
  • In another bowl, mash 3 overripe bananas* until liquid, then add in 3/4 c. sugar, 1 egg, and 3 tbsp. melted butter and stir til combined.
  • Gradually fold in the flour mixture to the banana mixture until just combined, then fold in 1/2 c. chopped walnuts.
  • Pour the batter into a buttered loaf pan and bake in a 350°F for 45-60 minutes, or until a cake tester comes out clean from the center of the cake.
  • Let cool in the pan for 10 minutes, then remove from the pan and let fully cool on a baking rack.
  • Slice and serve, or wrap up to keep in the freezer for at least a month.

Serves eight
*If your bananas aren't large, add one more. Bananas must be extremely ripe or they won't turn to liquid when mashed.


Friday, April 20

Oregano Chicken, Potato, & Tomato Roast


My cooking style is generally pretty quick and easy, but sometimes taking a few more minutes to attend to small details really makes a difference in a dish. This recipe for roasted chicken, potatoes, and tomatoes requires a little bit of extra attention and steps I’d usually just skip altogether (like peeling tomatoes), but it causes ordinary ingredients to get elevated into something much more complex. The tomatoes break down and blend with the chicken juices and oregano oil to form a delicious sauce that reduces and coats the meat and potatoes with tons of flavor. I like to add a little freshness at the end with a pile of arugula tossed with fresh lemon juice and olive oil. It’s a dish that’s worth the effort, and since you’re already going through the trouble of making it, you might as well have it for leftovers a second night.


Oregano Chicken, Potato, & Tomato Roast:
  • Add 1 lb. of fingerling* potatoes to a small pot of cold water, cover with a lid, and bring to a boil for 20 minutes, or until just tender.
  • Use a sharp knife to make a shallow x-shaped cut in the top of 14 oz. of large cherry tomatoes and add to the pot of water in the last minute of cooking time.**
  • Drain the potatoes and tomatoes and set aside in a bowl to cool slightly, then slip the skins off of the tomatoes and use your palm to flatten the potatoes and break them up slightly.
  • Meanwhile, slice 1 lb. boneless skinless chicken thighs into thin strips and add to a hot pan with 1 tbsp. olive oil.
  • Cook for 8 minutes, or until nicely browned, then add to a bowl with the tomatoes and potatoes.
  • Meanwhile, add 3-4 tbsp. fresh oregano leaves and 1 pinch of kosher salt to a mortar and pestle*** and bash until the leaves are broken and have released some of their oil.
  • Add in 4 tbsp. olive oil and 1 1/2 tbsp. red wine vinegar and mix together.
  • Add the oregano mixture to the chicken and veggies and toss to combine. Season with salt and pepper.
  • Transfer the mixture to a baking dish and cook in a 400°F oven for 40 minutes.
  • Remove and let cool slightly. Serve with bread (for mopping up juices) and a handful of arugula tossed with a squeeze of lemon and a drizzle of olive oil.

Serves four - five
*Or any small, waxy potato.
**The point here is not to cook the tomatoes, just to make it easy for their skin to come off.
***If you don't have a mortar and pestle you can just pulse the mixture in a small food processor.


Thursday, April 19

French Potato Omelette


As I mentioned before, I never make omelets. It’s not that they aren’t delicious, but something about the individual cooking and flipping of each one is just too much fuss for me. French omelettes, however, are the perfect compromise. Instead of standing over the stove and flipping, the eggs are simply poured over the other ingredients and then finish cooking in the oven (much like a frittata). This version is full of breakfast classics like bacon and hash browns, but it would be equally great for lunch or dinner alongside some greens.


Potato & Bacon Omelette:
  • Place 4 Yukon Gold potatoes in a pot, cover with cold water, cover with a lid, and boil for 25 minutes, or until tender. Drain and let cool slightly.*
  • Meanwhile, cut 4 slices of thick-cut bacon into small rectangles and cook in a skillet until crispy, about 7 minutes.
  • Remove bacon to a paper towel-lined plate and pour off all but 2 tbsp. bacon fat.
  • Add in 1 diced onion and cook for 5 minutes, or until translucent.
  • Dice the potatoes, add them to the skillet with the onions and 2 cloves of minced garlic, and cook for another 3-4 minutes, or until the potatoes are crispy.
  • Add the bacon back in and stir to evenly distribute. Season with salt and pepper.**
  • Whisk together 6 eggs, salt, and pepper, and pour over the potato mixture.
  • Transfer the skillet to a 400°F oven and cook for 5-7 minutes, or until eggs are just set.
  • Cut the omelette into wedges and serve with minced chives (optional).

Serves two - four
*Can be done a day ahead and kept in the fridge.
**The bacon will already add some salt so season carefully.


Wednesday, April 18

Pasta with Mashed Fava Beans


Fava beans just hit our local farmers’ market and will probably be around for just a few weeks before they’re gone. Cooking them is certainly a labor of love and requires some patience as each bean must be plucked from its pod, then quickly blanched in hot water, and finally rid of its tough outer shell before they can be eaten – but it’s so worth the effort. I recommend sitting on the porch with a drink and a friend in order to enjoy the experience as much as possible. Since the end product is nearly perfect by itself, I like to treat them simply by mashing with some herbs, Parmesan, and lemon. The fava mash can then be the basis of numerous meals: simply tossed with pasta (as I did here), spooned on top of grilled meat, or slathered onto toast.


Pasta with Mashed Fava Beans:
  • Remove 1 1/4 lb. fava beans from their pods, then place the beans in boiling water for 30 seconds.
  • Immediately drain beans and run under cold water to stop the cooking process.
  • Pop the beans out of the tough outer shells and place into a bowl.
  • Mash the beans with 1 tbsp. minced fresh basil, 1 tbsp. minced fresh parsley, 1/4 c. grated Parmesan cheese, the zest of 1/2 lemon, 1 minced clove of garlic, 3 tbsp. olive oil, salt, and pepper, until a paste forms.*
  • Meanwhile, bring a large pot of water to a boil and cook 1/2 lb. pasta until al dente.
  • Drain, reserving 1/2 c. pasta cooking water.
  • Toss the pasta with the fava bean mash and a handful of grated Parmesan, adding some of the water as necessary to moisten it.**
  • Check for seasoning, divide, and serve.

Serves two
*I like to keep my mash on the chunky side.
**I added about 1/4 c. total.


Tuesday, April 17

Lemon Yogurt Cake


I think I opened Pandora’s box with all the sweets I’ve been making lately (such as this and this) because I just can’t stop making them. This weekend I tried out this lemon yogurt cake, which is thankfully low-fat from substituting plain yogurt and canola oil for butter. As a bonus, it’s super easy to make (no mixer necessary!), although it does require some time to cool and glaze. I served it for dessert with berries and fresh whipped cream, but it would also make a great breakfast pastry in the morning. Or if you’re feeling really indulgent (which I often do), you can spread thin slices of the cake with jam and then layer the berries and whipped cream in between to make a quick trifle.


Lemon Yogurt Cake:
  • Sift together 1 1/2 c. flour, 2 tsp. baking powder, and 1 pinch salt in a bowl.
  • In another bowl, combine 1 c. plain yogurt,* 1 c. sugar, 3 eggs, 1 tsp. vanilla extract, and the zest of 2 lemons.
  • Slowly and gradually whisk the flour mixture into the wet ingredients until just combined, then fold in scant 1/2 c. canola oil until thoroughly combined.
  • Pour the batter into a buttered and floured** loaf pan and bake in a 350°F oven for 50-60 minutes, or until a tester inserted into the middle of the cake comes back clean.
  • Let cake cool in the pan for 10-15 minutes, then remove and place on a baking rack on top of a baking sheet.
  • Meanwhile, melt 1/3 c. sugar and 1/3 lemon juice in a small saucepan until the sugar dissolves. Let cool slightly.
  • Pour lemon sugar syrup over the cake and allow to cool completely.***
  • Whisk together 1 c. powdered sugar and 2 tbsp. lemon juice until smooth and pour glaze evenly over the cake.
  • Allow the glaze to harden completely, about an hour, then cut into slices and serve.

Serves eight - ten
*Do not use low-fat yogurt.
**I like to butter the pan, then put in a piece of buttered parchment at the bottom, then dust it with flour.
***I did all of this the night before, then covered in plastic wrap and kept in the fridge overnight. Just bring back to room temperature before glazing.


Monday, April 16

Crab Salad with Poached Eggs


After having such a great time at Easter brunch last weekend, we decided that we shouldn't have to wait for the next special occasion to have another one. We were graced with some more gorgeous weather, so we took our food outside and ate in the sunshine. I made a very Californian breakfast, inspired by a Crab Eggs Benedict that we had one morning during our recent trip to San Diego. This is a lighter take, with a warm lemony crab salad on an English muffin topped with poached eggs. It's a great way to start your day, especially during these upcoming warm months.


English Muffins with Crab & Poached Eggs:
  • Heat 1/2 tbsp. butter and 1/2 tbsp. olive oil in a small skillet.
  • Add in 3 minced scallions, 1/2 minced jalapeno,* and 1 large minced cherry tomato and cook for 4-5 minutes, or until soft.
  • Add in zest of 1 lemon, 1 tsp. lemon juice, 1/3 lb. cooked crab meat,** and 1/2 tbsp. butter.
  • Stir until butter is melted and season with salt and pepper. Keep on low heat until ready to serve.
  • Meanwhile, bring a small pot of water to just below a boil and add in 1 tbsp. white vinegar.
  • Crack an egg into a small bowl and gently slide the egg into the water.
  • Cook for 2-3 minutes, or until the white has set, then remove to a towel-lined plate to drain.
  • Season with salt and pepper and repeat another 3 times.
  • To assemble, toast 2 English muffins and place face-side up on a plate.
  • Top each muffin half with some of the crab salad, then top each with a poached egg.
  • Sprinkle a few more minced scallions on top and enjoy.

Serves two
*Or more if you like it spicy. I took the ribs and seeds out.
**I used Pacific stone crab meat, but any type of cooked crab is fine here.


Friday, April 13

Grilled Tuna Salad


I’m obsessed with good sushi but most of our favorite places require an hour-plus wait time, and even when I get a delivery order from our hole-in-the-wall down the street it stills costs a pretty penny. Great sushi chefs spend years mastering the art form (and it is art) so I think I would be setting myself up for disaster if I tried to create some of my favorite nigiri and rolls at home. This recipe for grilled tuna salad is my compromise, as it’s full of some of my favorite Japanese flavors (big eye tuna, wasabi, avocado) but without the fuss of sushi. The tuna is quickly seared on a hot grill and still raw inside, so it’s important to use the highest-quality, freshest fish you can find.


Grilled Tuna Salad:
For Dressing
  • Whisk together 1/8 c. olive oil, the zest of 1 lime, 3 tbsp. fresh lime juice, 2 tsp. soy sauce, 1 tbsp. sesame oil, 1/2 tsp. wasabi powder, 1 tsp. honey, a few drops of Sriracha hot sauce.
  • Taste and season with more hot sauce, salt, pepper, or honey as desired. Set aside.
For Salad
  • Brush a 3/4 lb. ahi tuna steak with olive oil and season well with salt and pepper.
  • Place on a very hot grill* for 2-3 minutes per side, or until a nice crust forms.
  • Remove and let cool slightly, then cut into bite-size pieces.
  • Meanwhile, largely dice 2 small avocados and toss with the dressing.
  • Add in the tuna, 1/4 thinly sliced red onion, 2 thinly sliced scallions, and 1 tbsp. toasted sesame seeds.**
  • Gently toss,*** divide onto plates, and sprinkle with a few more scallions.

Serves two-three
*Or you can use a very hot grill pan or skillet. Just make sure its super hot so that the tuna gets brown outside and stays raw in the middle.
**To toast, add the seeds to a dry skillet and place on low heat for 5 minutes, or until golden brown.
***Be careful not to over mix or the avocados will break up and turn the whole thing green.


Thursday, April 12

Nutella-Espresso Mousse


I love desserts but I don’t make them often because they’re usually time-consuming and made in large batches (and I don’t want to be tempted to split an entire cake or pie with my boyfriend). Luckily this nutella mousse can be made in literally just a few minutes and can easily be scaled down to individual portions or increased to feed a large crowd. The base is just cream, espresso powder, and nutella, but the flavor is so complex that people will think you spent all day making it. I like to layer the mousse with whipped cream and berries, but it would also be great with toasted nuts, chocolate-covered coffee beans, or other types of fruit.


Nutella-Espresso Mousse:
  • Combine 1 c. heavy cream and 1/4 tsp. instant espresso powder in a large bowl and whisk until dissolved.
  • Let sit for 5 minutes so that the espresso flavor infuses into the cream.
  • Add in 1/2 c. nutella* and beat with a mixer for a couple minutes, or until soft peaks form.
  • Cover with plastic wrap and chill until ready to serve, ideally a few hours.
  • To serve, place a few blackberries in the bottom of small bowls, layer in some of the mousse, top with fresh whipped cream,** and a few more berries.

Serves two - three
*A chocolate-hazelnut spread, now available at most grocery stores.
**To make whipped cream, combine 1/2 c. heavy cream, 1 tsp. vanilla extract, and 2 tbsp. powdered sugar and beat until soft peaks form.


Wednesday, April 11

Paprika Chicken


I’m always looking for ways to pump up the flavor on weeknight chicken dishes, which is why I make a lot of stir-fries, fajitas, etc. to transform the bland white meat into something much more interesting. This dish (inspired from this recipe) is different from my usual go-to’s in that I just simply pan roast bone-in, skin-on chicken breasts with a few vegetables and a quick sauce, but the flavor is still extraordinary. The secret ingredient is hot paprika, which adds a smoky, spicy taste and makes the whole dish turn bright orange. The sauce is so good that you’ll literally lick your plate and wish there was more.


Paprika Chicken:
  • Heat 1 tbsp. duck fat* in a small dutch oven over high heat.
  • Add in 2 lbs. bone-in, skin-on chicken breasts,** skin-side down, season well with salt and pepper, and cook for 4-5 minutes, or until golden brown.
  • Turn chicken and cook until brown on all sides, then remove to a plate.
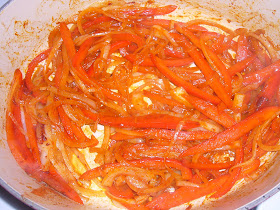
  • Lower the heat to medium-low and add in 1 thinly sliced onion, 1 thinly sliced red bell pepper, salt, pepper, and 1 tbsp. hot paprika.***
  • Cook vegetables until soft, about 10 minutes, stirring occasionally.
  • Add in 1/2 c. white wine and scrape any brown bits off the bottom of the pan.
  • Add the chicken back in, cover with a lid, and cook for another 30 minutes, or until chicken is cooked all the way through, turning the chicken over half way through.
  • Remove the chicken to a plate and tent with foil.
  • Increase the heat under the pot and boil down the sauce until reduced, about 4 minutes.
  • Turn off the heat and stir through 2 tbsp. sour cream, then immediately pour over the chicken.
  • Serve with rice or bread to soak up any extra sauce.

Serves four
*Or olive oil.
**I asked my butcher to cut two large breasts in half so that I had four pieces.
***If you can't find hot paprika, use 1 tbsp. regular paprika and a pinch of cayenne pepper.